Wednesday, August 12, 2015

Wednesday Kitchen - Summer Salad

Here on Wednesday Kitchen with the JET Team, I've been pondering... who wants to cook in this heat?!

In the summer months we do a lot of grilling outside, and we eat a lot of salads. We often get up early and head out to the farms for fresh pickings. My daughter and I were very happy with our strawberry pickings this year - they were so good and there were so many! We also picked spinach and other vegetables - they just taste so fresh and good :)


Here is an easy summer salad we made with a spinach & salad mix, strawberries & blueberries. My daughter made the dressing for us, as she makes delicious dressings. We're trying to eat light and healthy, and we enjoyed this salad a lot.


There's no recipe to follow, just throw the following ingredients together!

Ingredients

  • ½ cup of olive oil, or oil to your liking
  • ¼ teaspoon Worcestershire sauce
  • 1 Tablespoon minced onion
  • ¼ cup of distilled white vinegar
  • Fresh spinach & salad mix
  • Strawberries cleaned and sliced
  • ¼ cup almonds
  • Blueberries (optional)


For a more substantial meal, adding some grilled chicken will complement the salad well. Enjoy!

Michele
Michele of MAlves1009

Wednesday, July 29, 2015

Wednesday Kitchen - Hold the Mayo!

In this edition of Wednesday Kitchen, JET Team member Ida of AdroitJewelers has been experimenting with an alternative to mayonnaise....

Photo: cater4you.co.uk

Macaroni salad is a staple at summer picnics everywhere. But what’s with the “no mayo” you ask? Well, I’ve been trying to think of a way to make one without using all of the mayonnaise (and still have it taste good, of course.)

Wednesday, July 15, 2015

Wednesday Kitchen - Zucchini Spaghetti

This week on Wednesday Kitchen, JET Team team member Barbara of CapitalCityCrafts shares one of her favorite recipes for a healthy meal in minutes!

I love eating out so when I am cooking at home I try to eat as heathily as I possibly can. That means lots of vegetables and hardly any processed food.

Some of you may have seen the commercial for the "vegetti" maker. It's a simple cone which shreds zucchini (courgettes) into spaghetti-like strips. It really does work, so this fits right in with my healthy eating tools. The zucchini is so tender you can even eat it raw!


Today I'm feeling more traditional so I'm cooking a tomato sauce. You can open your favorite jar, but I like to cook down low sodium V8 juice and add my own herbs, garlic and sundried tomatoes. It only takes a few minutes to do this - just make sure it is slightly thicker than you normally want it.


Add the zucchini pasta and cook for just a few minutes. The moisture from the zucchini will thin the sauce. Add a few sprinkles of you favorite grated cheese if you like, and voila! A super healthy meal in minutes!


Enjoy!
Barbara
Barbara of CapitalCityCrafts

Wednesday, July 8, 2015

Wednesday Kitchen - Rose Petal Jelly

Welcome to another Wednesday Kitchen, featuring favorite recipes from members of the JET Team! This week, team member Carolyn of venusvelvet has been busy making delicious jam from rose petals!

I made this lovely and decadent jelly the other day. It's really easy to make and keeps for up to 2 months in the fridge. The jelly has a delicate rose flavour, but if you want a stronger rose flavour you can substitute a couple of tablespoons of culinary rose water for the plain water. This recipe also works great with violet flowers.


Ingredients

  • 2 cups lightly packed, fragrant and unsprayed rose petals
  • 3 tablespoons freshly squeezed lemon juice
  • 2 cups sugar
  • 1½ teaspoon pectin
  • 1½ cups water


To Make

  1. Carefully sift through the rose petals to make sure no little creatures are hiding in them
  2. Put water and roses in a sauce pan and bring to a gentle simmer for 5 minutes
  3. Add 1¾ cups of the sugar and stir to dissolve. The rose petals will lose their lovely colour, but don't worry... when you add the lemon juice the colour magically reappears!
  4. Add the lemon juice and simmer for 5 minutes
  5. Mix the remaining ¼ cup sugar and the pectin in a bowl
  6. While stirring the jam, add the pectin mixture sprinkle by sprinkle to ensure the pectin incorporates without clumping
  7. Continue to simmer for 20 minutes
  8. Refrigerate when cool


Wednesday, July 1, 2015

Wednesday Kitchen - Collard Greens with Blackeye Peas

Welcome to another Wednesday Kitchen with the JET Team! Everyone seems to be on the Kale wagon these days, but we really don't care for Kale here. Instead, we like Collard greens. These are Brassica cultivars, from the same family as Brussels sprouts and cabbages - with health benefits reputed to include lowering cholesterol.

I went to the farm the other day and picked some Collard greens, and I have to go back and get more as this dish was delicious! I like to saute the greens with blackeye peas, but you can substitute white beans or leave them out entirely. Either way, this makes a great side dish!

Photo: Andrew Scrivani for The New York Times

Ingredients

  • 1 large bunch Collard Greens
  • ½ Pound Blackeye Peas or White Beans
  • 3 Cloves Garlic
  • 3 Small Shallots
  • 1½ Tablespoons Olive Oil
  • Salt and Pepper to taste


To Make

  1. Put a large pan of water on to boil
  2. Roll up the leaves and cut them very thin, up to the stem


  3. Add the greens to boiling water for 3-5 minutes
  4. Drain and rinse the greens quickly with cold water to retain that nice green color


  5. Rinse the blackeye peas


  6. Saute the shallots and garlic in olive oil, with the salt, pepper
  7. Add the greens and blackeye peas, and cook on low light for another 8-10 minutes


  8. Enjoy!

Michele
Michele of malves1009

Wednesday, June 24, 2015

Wednesday Kitchen - Chocolate Cake

Welcome to another Wednesday Kitchen, featuring favourite recipes from members of the JET Team! Today our team member Jennifer, of WearableByDesign, takes a break from creating amazing jewelry to share an amazing cake recipe with us!


This is a low carb, gluten free recipe for chocolate cake... a seriously delicious, dense and chocolatey cake that will satisfy any dieter's cravings!


Cake Ingredients

  • 2 Cups Almond Flour
  • ⅔ Cup Dark Cocoa
  • ⅓ Cup Coconut Flour
  • ⅓ Cup Unflavored Whey Protein Powder
  • 1 Tbsp Baking Powder
  • ½ Tsp Salt
  • ½ Cup Butter, Softened
  • ¾ Cup Swerve Sweetener
  • 4 Large Eggs
  • 1 Tsp Vanilla Extract
  • 10 Pkts Splenda
  • 1 Shot Espresso plus Heavy Cream to make 3/4 Cup


Frosting Ingredients

  • 8 oz. Cream Cheese Softened
  • 6 Tablespoons Butter, Softened
  • 1 Cup Powdered Swerve Sweetener
  • ⅔ Cup Heavy Cream
  • 1 Teaspoon Salt
  • 8 Pkts Splenda
  • 2 Teaspoons Vanilla

To Make

  1. Heat oven to 325 degrees
  2. Combine your dry ingredients into a bowl


  3. Cream your butter and sweetener


  4. Add eggs


  5. Mix half the dry ingredients into the butter and egg mixture, then add the espresso mixed with cream


  6. Stir in remaining dry ingredients


  7. Spread evenly into a prepared 8 x 8 inch square baking dish


  8. Bake at 325 for about 35 minutes, until a toothpick comes out dry when inserted into the center of the cake
  9. Cream together the cream cheese and the butter


  10. Add the rest of the ingredients and beat until smooth


  11. Frost the cooled cake

  12. Enjoy!!


Jenn
Jennifer of WearableByDesign

Wednesday, June 17, 2015

Wednesday Kitchen - Boundary Waters Wild Rice Soup

This week on Wednesday Kitchen, the JET Team is cooking up a family favorite soup recipe - in fact, it's everybody's family favorite!

I'm just unsure what to call it, or who deserves the credit! If you grew up in Minnesota, you knew Dayton's, which then became Dayton Hudson, which was then purchased by Marshall Fields, which was then purchased by Macy's. So at this stage, Macy's is taking credit for this recipe from the 1960s, and all I can tell you is that it is soul satisfying and heartwarming, and good in all seasons!

Photo: daiseyjaney.com


This is a very healthy dish. Ok, so there is a little heavy cream. You could always modify and use a fat free milk but really....... why would you do this to such a wonderful bowl of goodness?!


Ingredients

  • 6 tbsp unsalted butter
  • 1 cup diced yellow onion
  • 1 small leek, halved lengthwise, rinsed well and thinly sliced
  • 1½ cup sliced button mushrooms
  • ¾ cup diced carrots
  • ½ cup flour
  • 6 cups chicken broth
  • 1½ cups cooked wild rice
  • ½ roasted chicken, skin and bones removed and meat chopped (1 to 1½ cups)
  • 1 cup heavy cream
  • 5 tbsp dry sherry
  • 2 tsp salt
  • 1½ tsp freshly ground black pepper
  • 2 tbsp freshly chopped flat-leaf parsley
  • 1 tsp freshly chopped thyme leaves
  • 2 tbsp slivered almonds, toasted, for garnish


Photo: chow.com


To Make

  1. Melt butter in a large saucepan over medium heat
  2. Add onion and sauté for about 5 minutes, until translucent
  3. Add leek, mushrooms and carrots and cook for about 5 minutes until softened, stirring occasionally
  4. Add flour and cook for 1 minute, stirring occasionally
  5. Whisk in chicken broth
  6. Bring to a boil, then decrease heat to low and simmer for 20 minutes
  7. Add remaining ingredients and cook for about 5 minutes, until warmed through
  8. Taste and adjust seasonings as necessary
  9. Ladle into bowls, garnish with almonds and serve hot


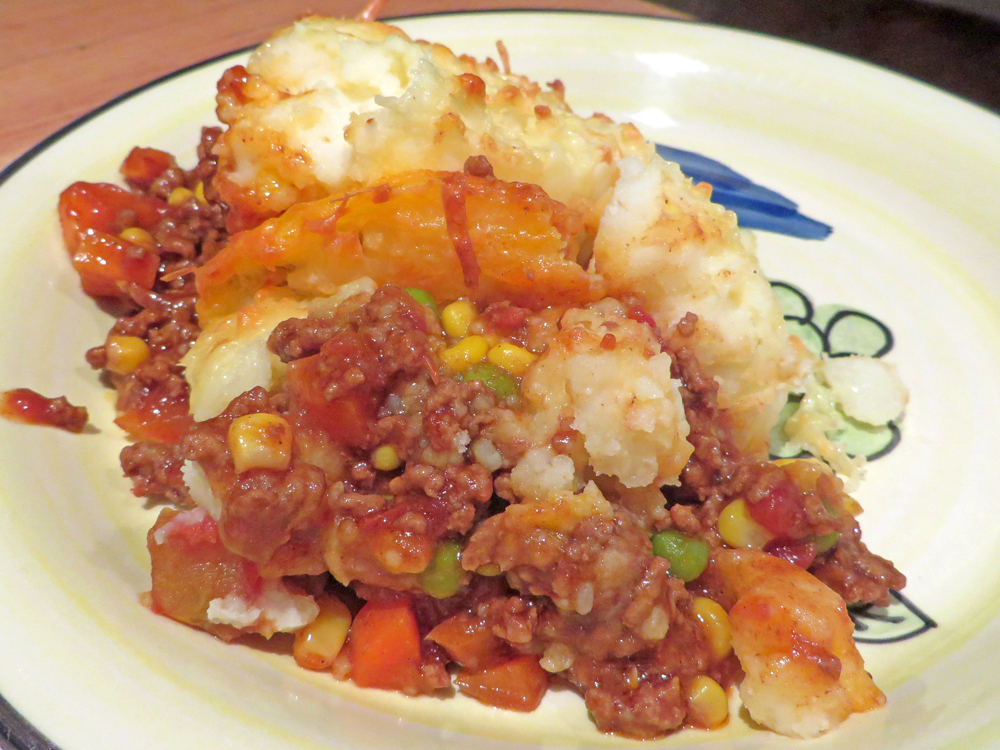
Photo: gettystewart.com


Note: To toast almonds, spread nuts in a single layer on a parchment paper-lined baking sheet and bake in a 350-degree oven until almonds are lightly browned and fragrant, about 7 to 10 minutes. From The Marshall Field's Cookbook

Lynn

Wednesday, June 10, 2015

Wednesday Kitchen - Food on a Stick

Hi everyone, and welcome to another Wednesday Kitchen with the JET Team! While I'm not presenting any of my own recipes today, I will be directing you to the internet, where you will find thousands of delicious offerings at the touch of a finger!

Summer means BBQ time and who doesn't love food on a stick? It's easy, it's fun and it breaks all the rules. Out with the silverware, this is finger food season! To get you started, here are a few mouth watering recipes courtesy of epicurious.com.

How about these glazed Japanese chicken meatballs as a great appetizer - serve them poolside, right off the grill!

Photo: David Malosh


And these apricot chicken skewers just scream summer!

Photo: Christopher Baker


My dad's Meyer lemon trees are already heavy with fruit, so these chicken skewers with Meyer lemon salsa will be just perfect!

Photo: Marcus Nilsson


And now, dessert time!! How about these delicious frozen chocolate-dipped bananas with peanut brittle, for a perfect end to a perfect day!

Photo: Lara Ferroni


Food on a stick is a wonderful and fun way to host a dinner party, or a night of family fun around the grill. Easy, colorful and always fun! Welcome back, Summer!!

Lynn

Wednesday, June 3, 2015

Wednesday Kitchen - One Pot Lentil Stew

Welcome to another Wednesday Kitchen, featuring favourite recipes from members of the JET Team! This week Bev of linkouture shares her one-pot recipe for lentil stew:


This delicious lentil stew is adapted from a recipe by happyhealthymama.com, and is now one of my favorite dishes. It's very healthy and filling, as well as really quick and easy to make!

Ingredients

  • 2 cans stewed tomatoes
  • 1 can coconut milk
  • 1 bag frozen string beans
  • 1 medium onion
  • 1 cup red lentils
  • 2 cloves of garlic
  • 2 tsp turmeric
  • 1 tsp black pepper
  • 1 tbsp olive oil
  • 1 pinch of salt


To Make

  1. Heat the olive oil in a large pan on medium heat
  2. Dice the onion and mince the garlic
  3. Sauté the onion & garlic until the onions are soft and transparent
  4. Add the tomatoes & coconut milk and cook until bubbling, stirring occasionally
  5. Add the lentils, ground pepper & turmeric
  6. Turn down heat and simmer, covered, for about 30 minutes or until the lentils are cooked through
  7. Add salt to taste then stir in the beans


Serve and enjoy!
Bev

Bev of linkouture

Wednesday, May 27, 2015

Wednesday Kitchen - Carrot Cake

Happy Wednesday! This week in the JET Team kitchen, Michele of MAlves1009 shares her absolutely delicious recipe for carrot cake...

I had never made carrot cake before, as I figured it was difficult to make. And then I was invited to a get together with friends and family - I was asked to bring a dessert, and I knew they all liked carrot cake.

So, I thought I'd give it a try at last and - if it didn't work out - I knew I could always run and get something from the bakery!


For the Carrot Cake

  • 2 cups of all purpose flour
  • 2 tsp baking soda
  • 2 tsp baking powder
  • ½ tsp salt
  • 3 tsp cinnamon
  • ½ tsp nutmeg
  • 4 eggs
  • 2 tablespoons milk
  • 1¼ cups oil (I used canola)
  • ¾ cup sugar
  • 1 cup brown sugar
  • 2 tsp vanilla
  • 3 cups grated carrots
  • 1 cup pecans or walnuts (optional - I used walnuts)
  • 1 cup raisins (optional - I left these out as my family don't care for them)
  • ¼ cup coconut flakes


For the Cream Cheese Frosting

  • 8 oz cream cheese softened
  • ½ cup butter, softened
  • 2 cups powdered sugar
  • 1 tsp vanilla


To Make

  1. In a bowl mix together the flour, baking soda, baking powder, salt, cinnamon and nutmeg, then set aside
  2. In a mixing bowl, whisk together eggs, 2 tablespoons milk, oil, sugars and vanilla until firm
  3. Add the dry ingredients to the wet mixture and mix for about 2 minutes
  4. Add the grated carrots, nuts and/or raisins. Mix well until everything is combined
  5. Pour batter into floured cake pans - I used a double, but you can use any cake pan you like
  6. Bake at 325 degrees for 45 to 50 minutes, turning and checking after 20 minutes


  7. While the cake is baking, make your frosting...
  8. In a mixing bowl beat together cream cheese and butter until creamy
  9. Add the powdered sugar and vanilla, and mix until smooth
  10. Once the cake is cooled, add your frosting and sprinkle with nuts if you wish


To make sure I liked how this recipe turned out, I made a few mini cupcakes to taste. And I have to say, it came out really well!

When I walked in with the cake, everyone said "Oh, Carrot Cake! My favorite!", and they all loved it. I do hope you will try this recipe, and enjoy it as much as they did!

Michele
Michele of malves1009

Wednesday, May 20, 2015

Wednesday Kitchen - Green Enchiladas

In this week's Wednesday Kitchen, JET Team leader Lynn of UrbanPearlStudio shares another of her delicious recipe creations...

Considering we live in the heart of Texas, our week usually has at least one Tex-Mex meal on the menu. On Sunday, I will prepare and cook the bulk of the ingredients we will use for the next 4 to 5 days so that, after a long work day, it's really just assembly, heat and serve.


My recipes are usually "seat of the pants" and can be altered to include any of your favorite meats or vegetables. This recipe is an easy prep/easy clean meal of green enchiladas, which is a twist from the usual red sauce enchilada recipe found in most Tex-Mex restaurants. Don't be shy on this one, get creative and use your imagination!

You Will Need:

  • 1 to 1½ pounds of cooked ground meat
    (I used 99% lean ground white turkey breast meat to reduce fat and calories)
  • 1 dozen corn tortillas
  • Green enchilada sauce (I absolutely love Frontera, by Rick Bayless)
  • ½ pound of shredded or crumbled Queso Fresco Mexican Cheese
    (substitute Monterrey Jack or Cheddar if you wish)
  • ½ can of drained corn
  • Some fresh chopped onion, jalapeno pepper, cilantro and tomato


To Make:

  1. Begin by lining the baking dish with parchment paper, then gather the ingredients and create an assembly line of sorts.


  2. Once the assembly line is ready to go, heat a flat non stick pan on the stove. You must quickly and gently heat the tortillas so they become soft and pliable or they will crack during assembly.
  3. Drizzle the green enchilada sauce over the parchment paper in the bottom of your pan. You want some of that delicious sauce on the bottom as well as over the top of the dish.
  4. Take a heated tortilla and place on a flat surface. Add a few spoons of cheese, corn, onion, jalapeno and meat being very cautious not to fill it too full or you will never be able to roll it.
  5. Gently roll the tortilla and place in the pan. Repeat until your pan is full. Try not to crowd them too much, or you will never be able to get them out successfully.


  6. Once the pan is full, top with green enchilada sauce, the remaining meat and veggies and then more queso fresco cheese.
  7. Cover your pan with foil and bake at 350 degrees for around 20 min, testing to ensure the center is warm.
  8. Uncover for 5 more minutes to brown up your cheese.
  9. Remove from the oven and allow to rest a few minutes before serving. Top with fresh cilantro and chopped tomato.
  10. Mmmmm, delicious - enjoy!


Wednesday, May 13, 2015

Wednesday Kitchen - Shepherds Pie

In today's Wednesday Kitchen, our JET Team leader Mandy of BeadsMe writes all the way from Australia to share her recipe for "throw it all in" Shepherds Pie.

This is a great meal for a working family, or if there are just two of you it will last a couple of days. My hubby and I work full time so when we get home we like to have a quick dinner then relax - so getting something together over the weekend means we have more time to cuddle up on the couch :)


My "throw it all in" recipe is kind to the purse - I can produce a meal that will last 2 days for only $20AUD (about $16 USD). You can also make different variations by adding onions, spices, any veggies, or other minced meat. It's an awesome recipe to play around with!

Ingredients


  • 500g minced meat (beef for Cottage Pie, or lamb for Shepherds Pie)
  • Couple of carrots, chopped in to small pieces
  • Packet frozen peas and corn
  • Potatoes (I used just a couple more than is pictured)
  • Packet of cottage pie mix (optional – you could just use gravy)
  • Tin chopped tomatoes


OK, let’s cook!


  1. Brown the mince
  2. Add mix or gravy, tin tomatoes and veggies
  3. Simmer for about 15 mins
  4. Pour meat mixture into pyrex or casserole dish/es (I use 2 pyrex dishes)
  5. Peel and chop potatoes, and boil until they are of a mashable consistency – usually about 20 to 30 minutes depending on size
  6. This is the time to sit and have a cuppa!
  7. Mash the potatoes – I add a bit of butter and a lot of grated cheese
  8. Spoon the mashed potatoes on top of the meat/veg mixture


  9. Optionally, slice tomatoes and lay on top of the meat before adding the potatoes
  10. Now just put aside until dinner time
  11. To cook, preheat your oven to about 180C and pop your ready meal in for about 30 minutes
  12. I top my pie with more grated cheese, to make it golden and crispy on top
  13. Voila – yummmmmmmmmm!


You can serve this on it’s own, with more veggies or salad, or just smother it in gravy. I love serving with gravy - the child in me comes out and I mix it all together so it looks like mush!

Tip – when cooking the meat and veg if the mix seems watery add some gravy granules. If it looks too thick just add a bit of water


Enjoy!
Mandy
Mandy of BeadsMe